
Nowadays most of our mobile phones have useful features such as the ability to take a screenshot. Along with a display screen size of 5.5″ and a resolution of 1080 x 1920px, the Oukitel K10000 Pro from Oukitel promises to seize high quality pictures of the best occasion of your personal life.
For a screenshot of your favorite apps like Twitter , Wechat , Linkedin,… or for one email, the technique of taking screenshot on your Oukitel K10000 Pro running Android 7.0 Nougat is definitely incredibly convenient. Believe it or not, you have the option among two simple techniques. The first one make use of the regular equipment of your Oukitel K10000 Pro. The second solution is going to make you implement a third-party software, reliable, to generate a screenshot on your Oukitel K10000 Pro. Let’s see the first method
The right way to generate a manual screenshot of your Oukitel K10000 Pro
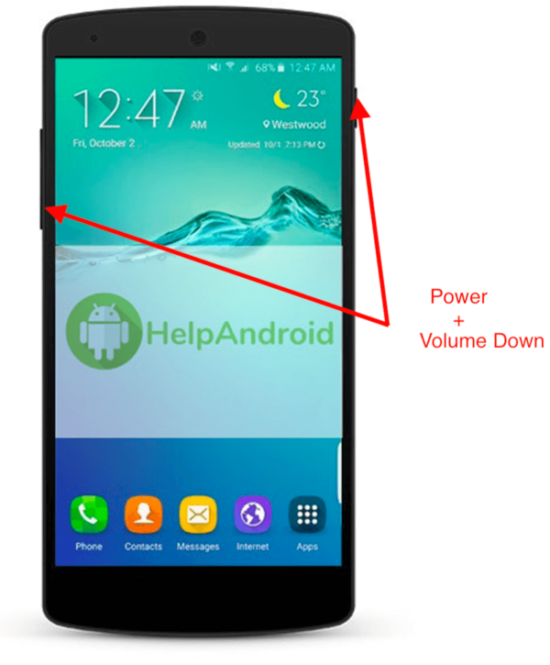
- Head to the screen that you expect to record
- Hold synchronously the Power and Volum Down button
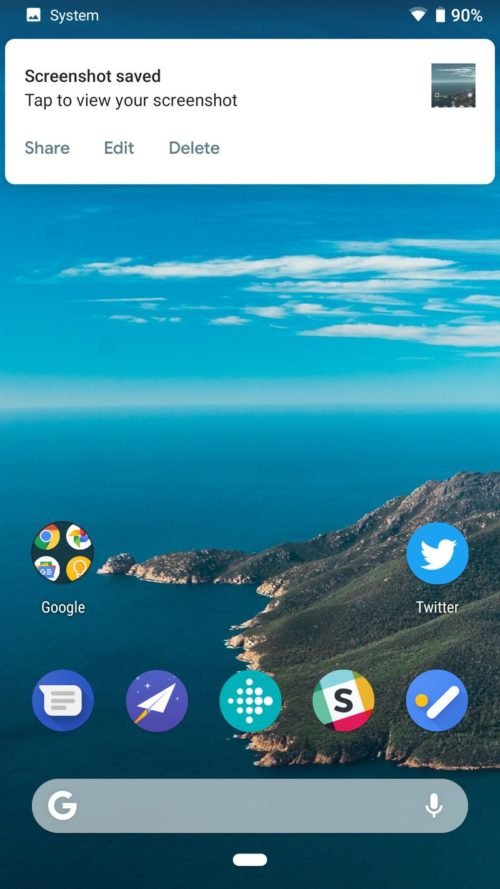
- Your Oukitel K10000 Pro easily made a screenshoot of your screen
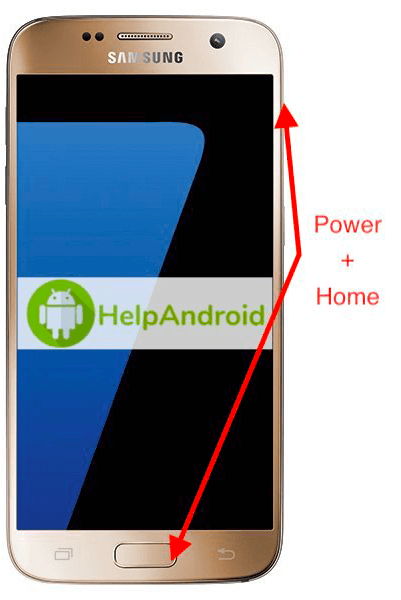
However, if your Oukitel K10000 Pro lack home button, the procedure is the following:
- Hold synchronously the Power and Home button
- The Oukitel K10000 Pro easily shot a fantastic screenshot that you are able publish by mail or Facebook.
- Super Screenshot
- Screen Master
- Touchshot
- ScreeShoot Touch
- Hold on tight the power button of the Oukitel K10000 Pro right until you experience a pop-up menu on the left of the display screen or
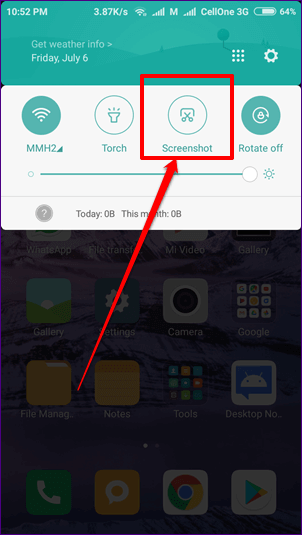
- Check out the display screen you choose to to shoot, swipe down the notification bar to see the screen down below.
- Tick Screenshot and voila!
- Check out your Photos Gallery (Pictures)
- You have a folder known as Screenshot
How to take a screenshot of your Oukitel K10000 Pro by using third party apps
In the casethat you choose to capture screenshoots with third party apps on your Oukitel K10000 Pro, it’s possible!! We selected for you a couple of very good apps that you may install. There is no need to be root or some shady tricks. Install these apps on your Oukitel K10000 Pro and capture screenshots!


Special: If you can update your Oukitel K10000 Pro to Android 9 (Android Pie), the method of making a screenshot on the Oukitel K10000 Pro is going to be way more easy. Google made the decision to ease the operation like that:
Now, the screenshot taken with your Oukitel K10000 Pro is kept on a distinctive folder.
Following that, it is easy to publish screenshots realized on your Oukitel K10000 Pro.
More ressources for the Oukitel brand and Oukitel K10000 Pro model
Source: Screenshot Google
Source: Screenshot Oukitel