
In these days a lot of our smartphones feature useful specifications such as the ability to capture a screenshot. Using a display screen size of 5.5″ and a resolution of 1080 x 1920px, the ViewSonic V500 from ViewSonic offers to take high quality photos of the best moment of your personal life.
Suitable for a screenshot of famous apps like WhatsApp, Reddit, Linkedin,… or for one text message, the process of shooting screenshot on your ViewSonic V500 using Android 4.4 KitKat is going to be very fast. Believe it or not, you have the choice between two common options. The first one uses the generic tools of your ViewSonic V500. The second solution is going to have you implement a third-party application, accredited, to create a screenshot on your ViewSonic V500. Let’s see the first method
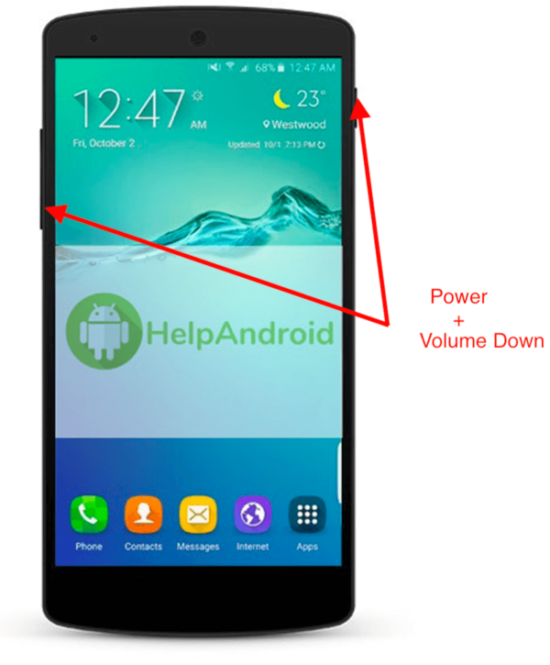
The right way to generate a manual screenshot of your ViewSonic V500
- Head over to the screen that you want to capture
- Press simultaneously the Power and Volum Down key
- Your amazing ViewSonic V500 simply made a screenshoot of your display
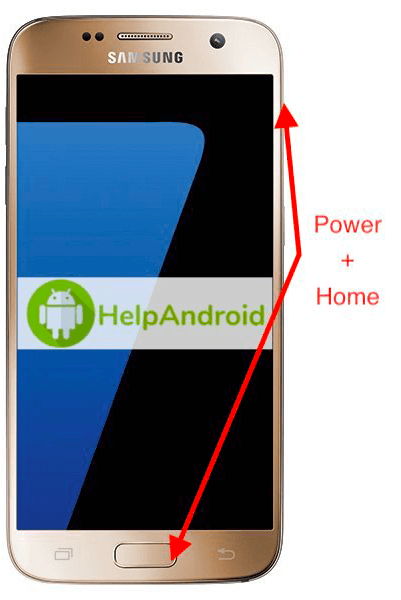
In the case that your ViewSonic V500 lack home button, the approach is the following:
- Press simultaneously the Power and Home key
- The ViewSonic V500 simply took a superb screenshot that you are able show by email or Facebook.
- Super Screenshot
- Screen Master
- Touchshot
- ScreeShoot Touch
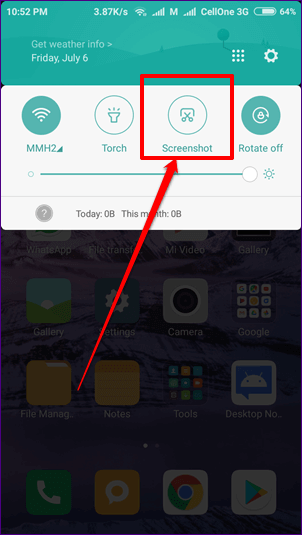
- Hold on tight the power button of your ViewSonic V500 right until you find out a pop-up menu on the left of your display screen or
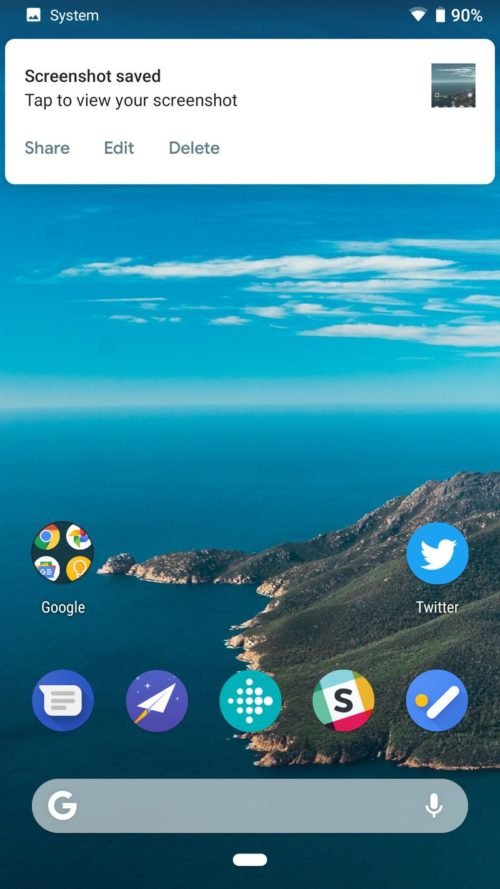
- Check out the display screen you choose to to shoot, swipe down the notification bar to find out the screen below.
- Tick Screenshot and voila!
- Check out your Photos Gallery (Pictures)
- You have a folder called Screenshot
How to take a screenshot of your ViewSonic V500 by using third party apps
In cases where you prefer to make screenshoots thanks to third party apps on your ViewSonic V500, it’s possible!! We picked for you one or two really good apps that you should install. No need to be root or some questionable tricks. Download these apps on your ViewSonic V500 and make screenshots!


Special: In the event that you can update your ViewSonic V500 to Android 9 (Android Pie), the method of taking a screenshot on your ViewSonic V500 is considerably more smooth. Google agreed to shorten the method this way:
At this moment, the screenshot taken with your ViewSonic V500 is kept on a distinctive folder.
From there, you are able to share screenshots taken on your ViewSonic V500.
More ressources for the ViewSonic brand and ViewSonic V500 model
Source: Screenshot Google